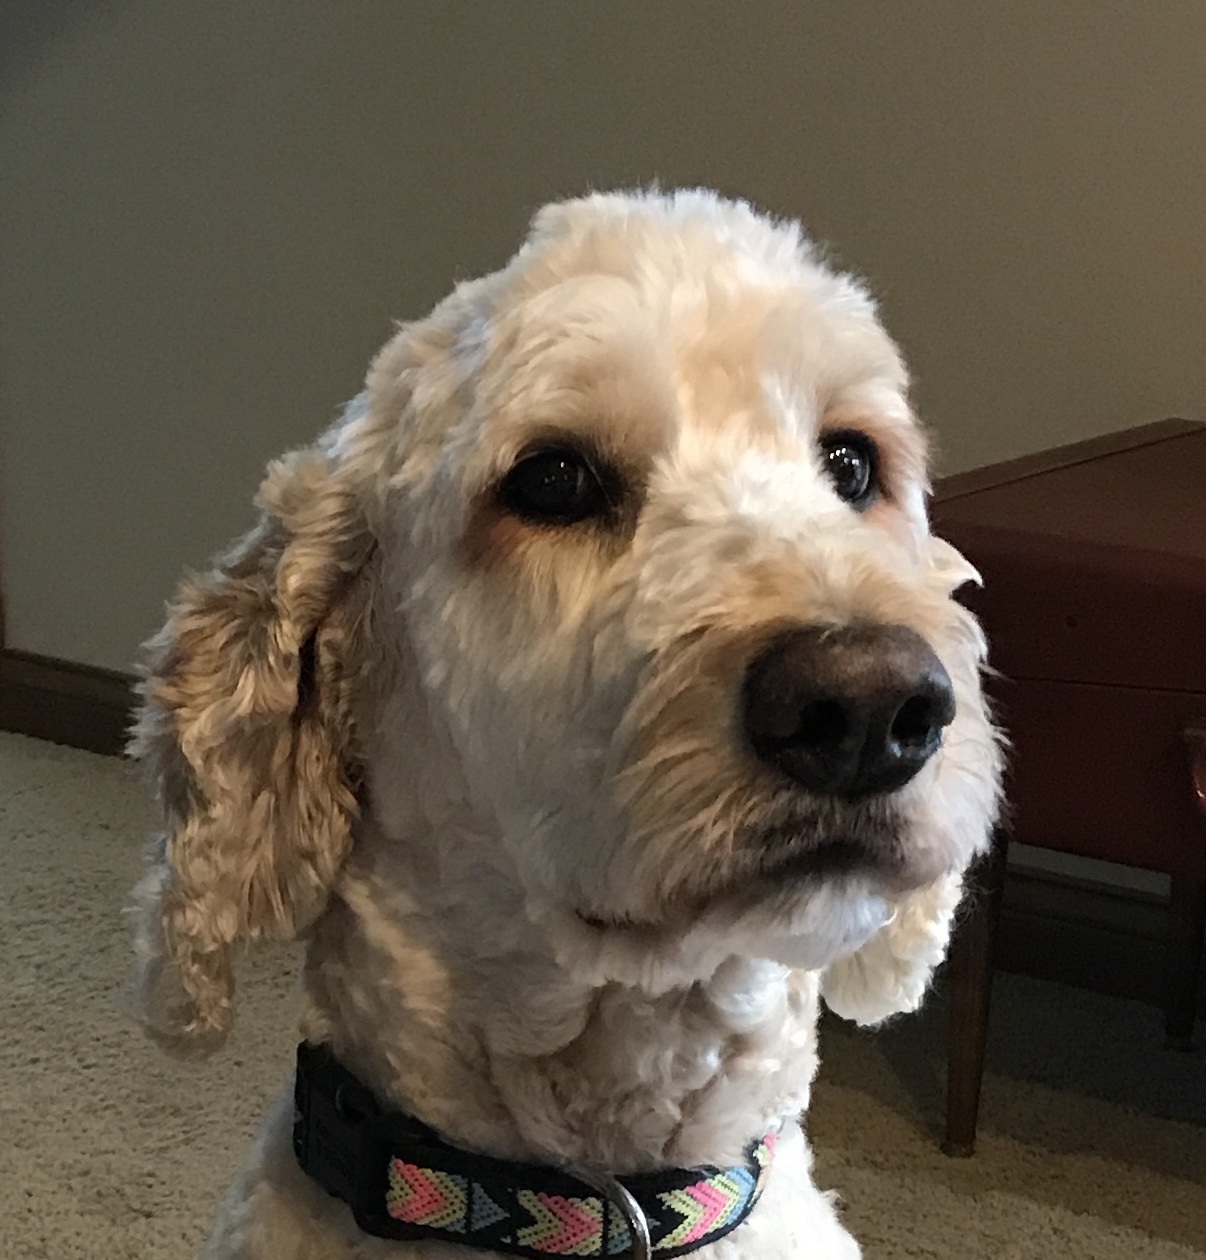
My next marquetry project is a portrait of Banner, our grandkids' dog. I searched online for a photo of a similar dog and found none close enough, but I did find a painting that showed me how to break up the colors and shadows to be painted with a minimal number of colors. I took a photo of banner to be the model for the marquetry.
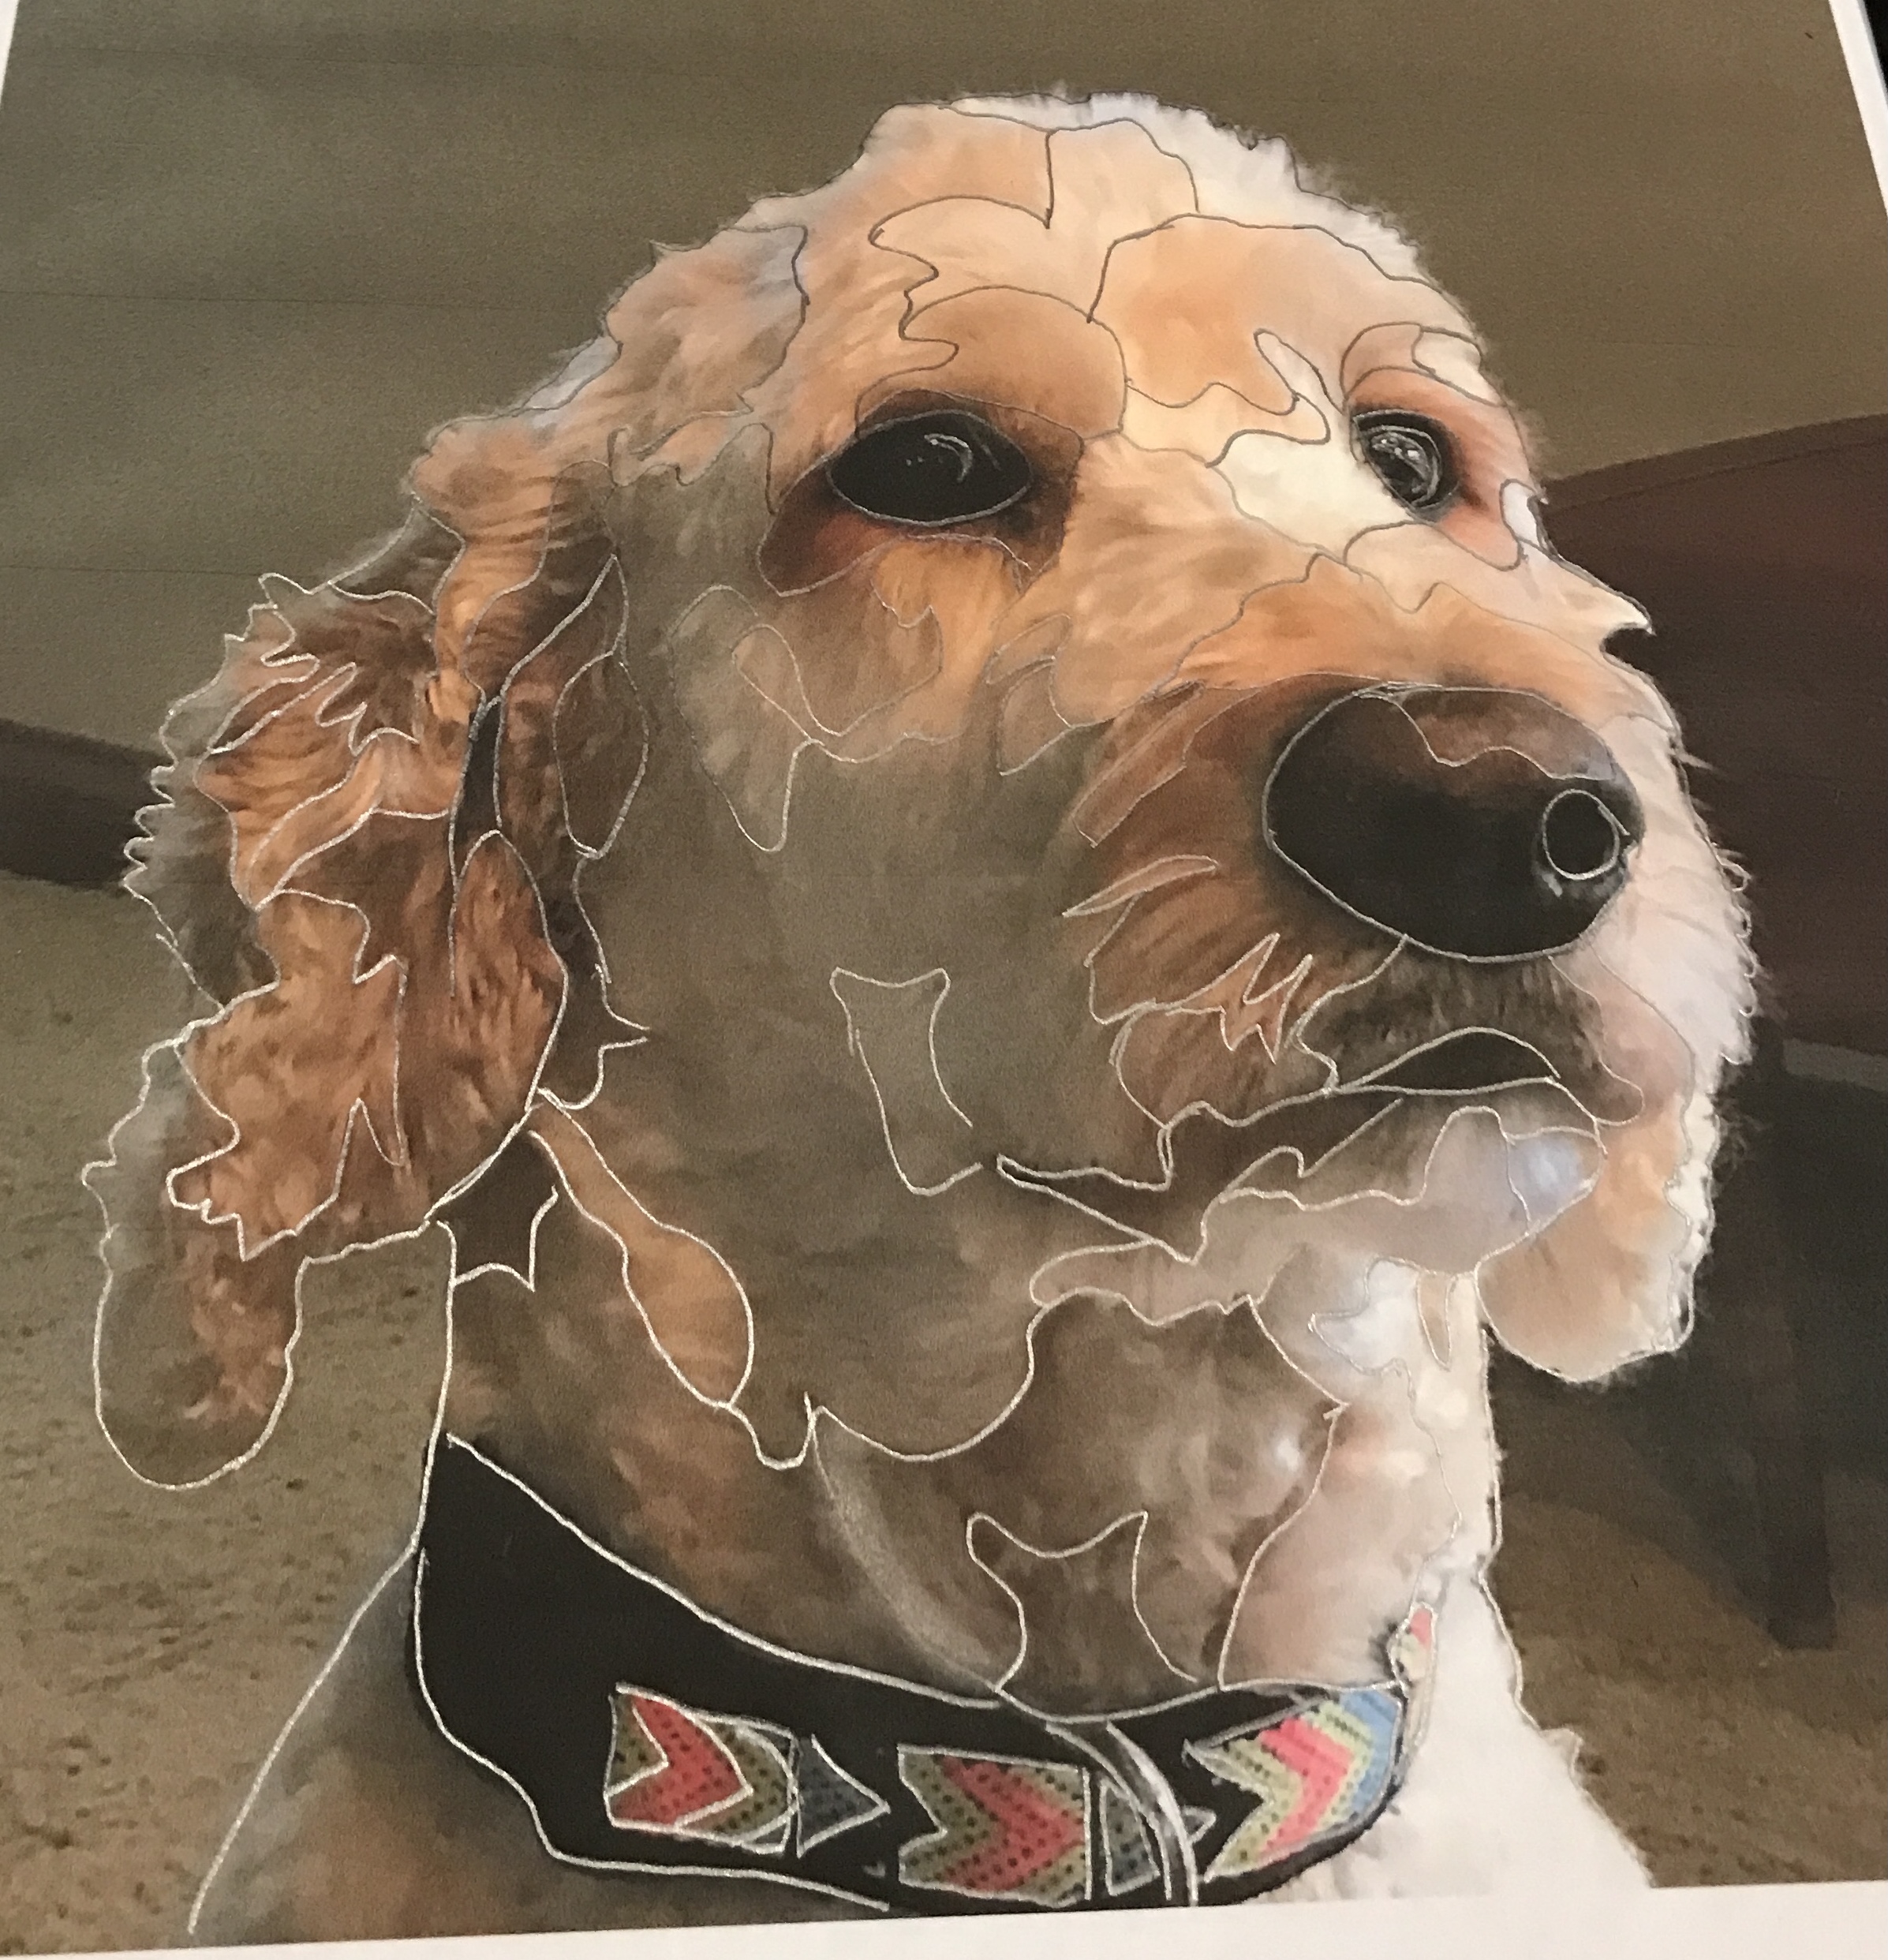
The next step was outlining the different colors of hair and the shadows. A few simplifications were made along the way. The results of this outlining are shown in the photo below.
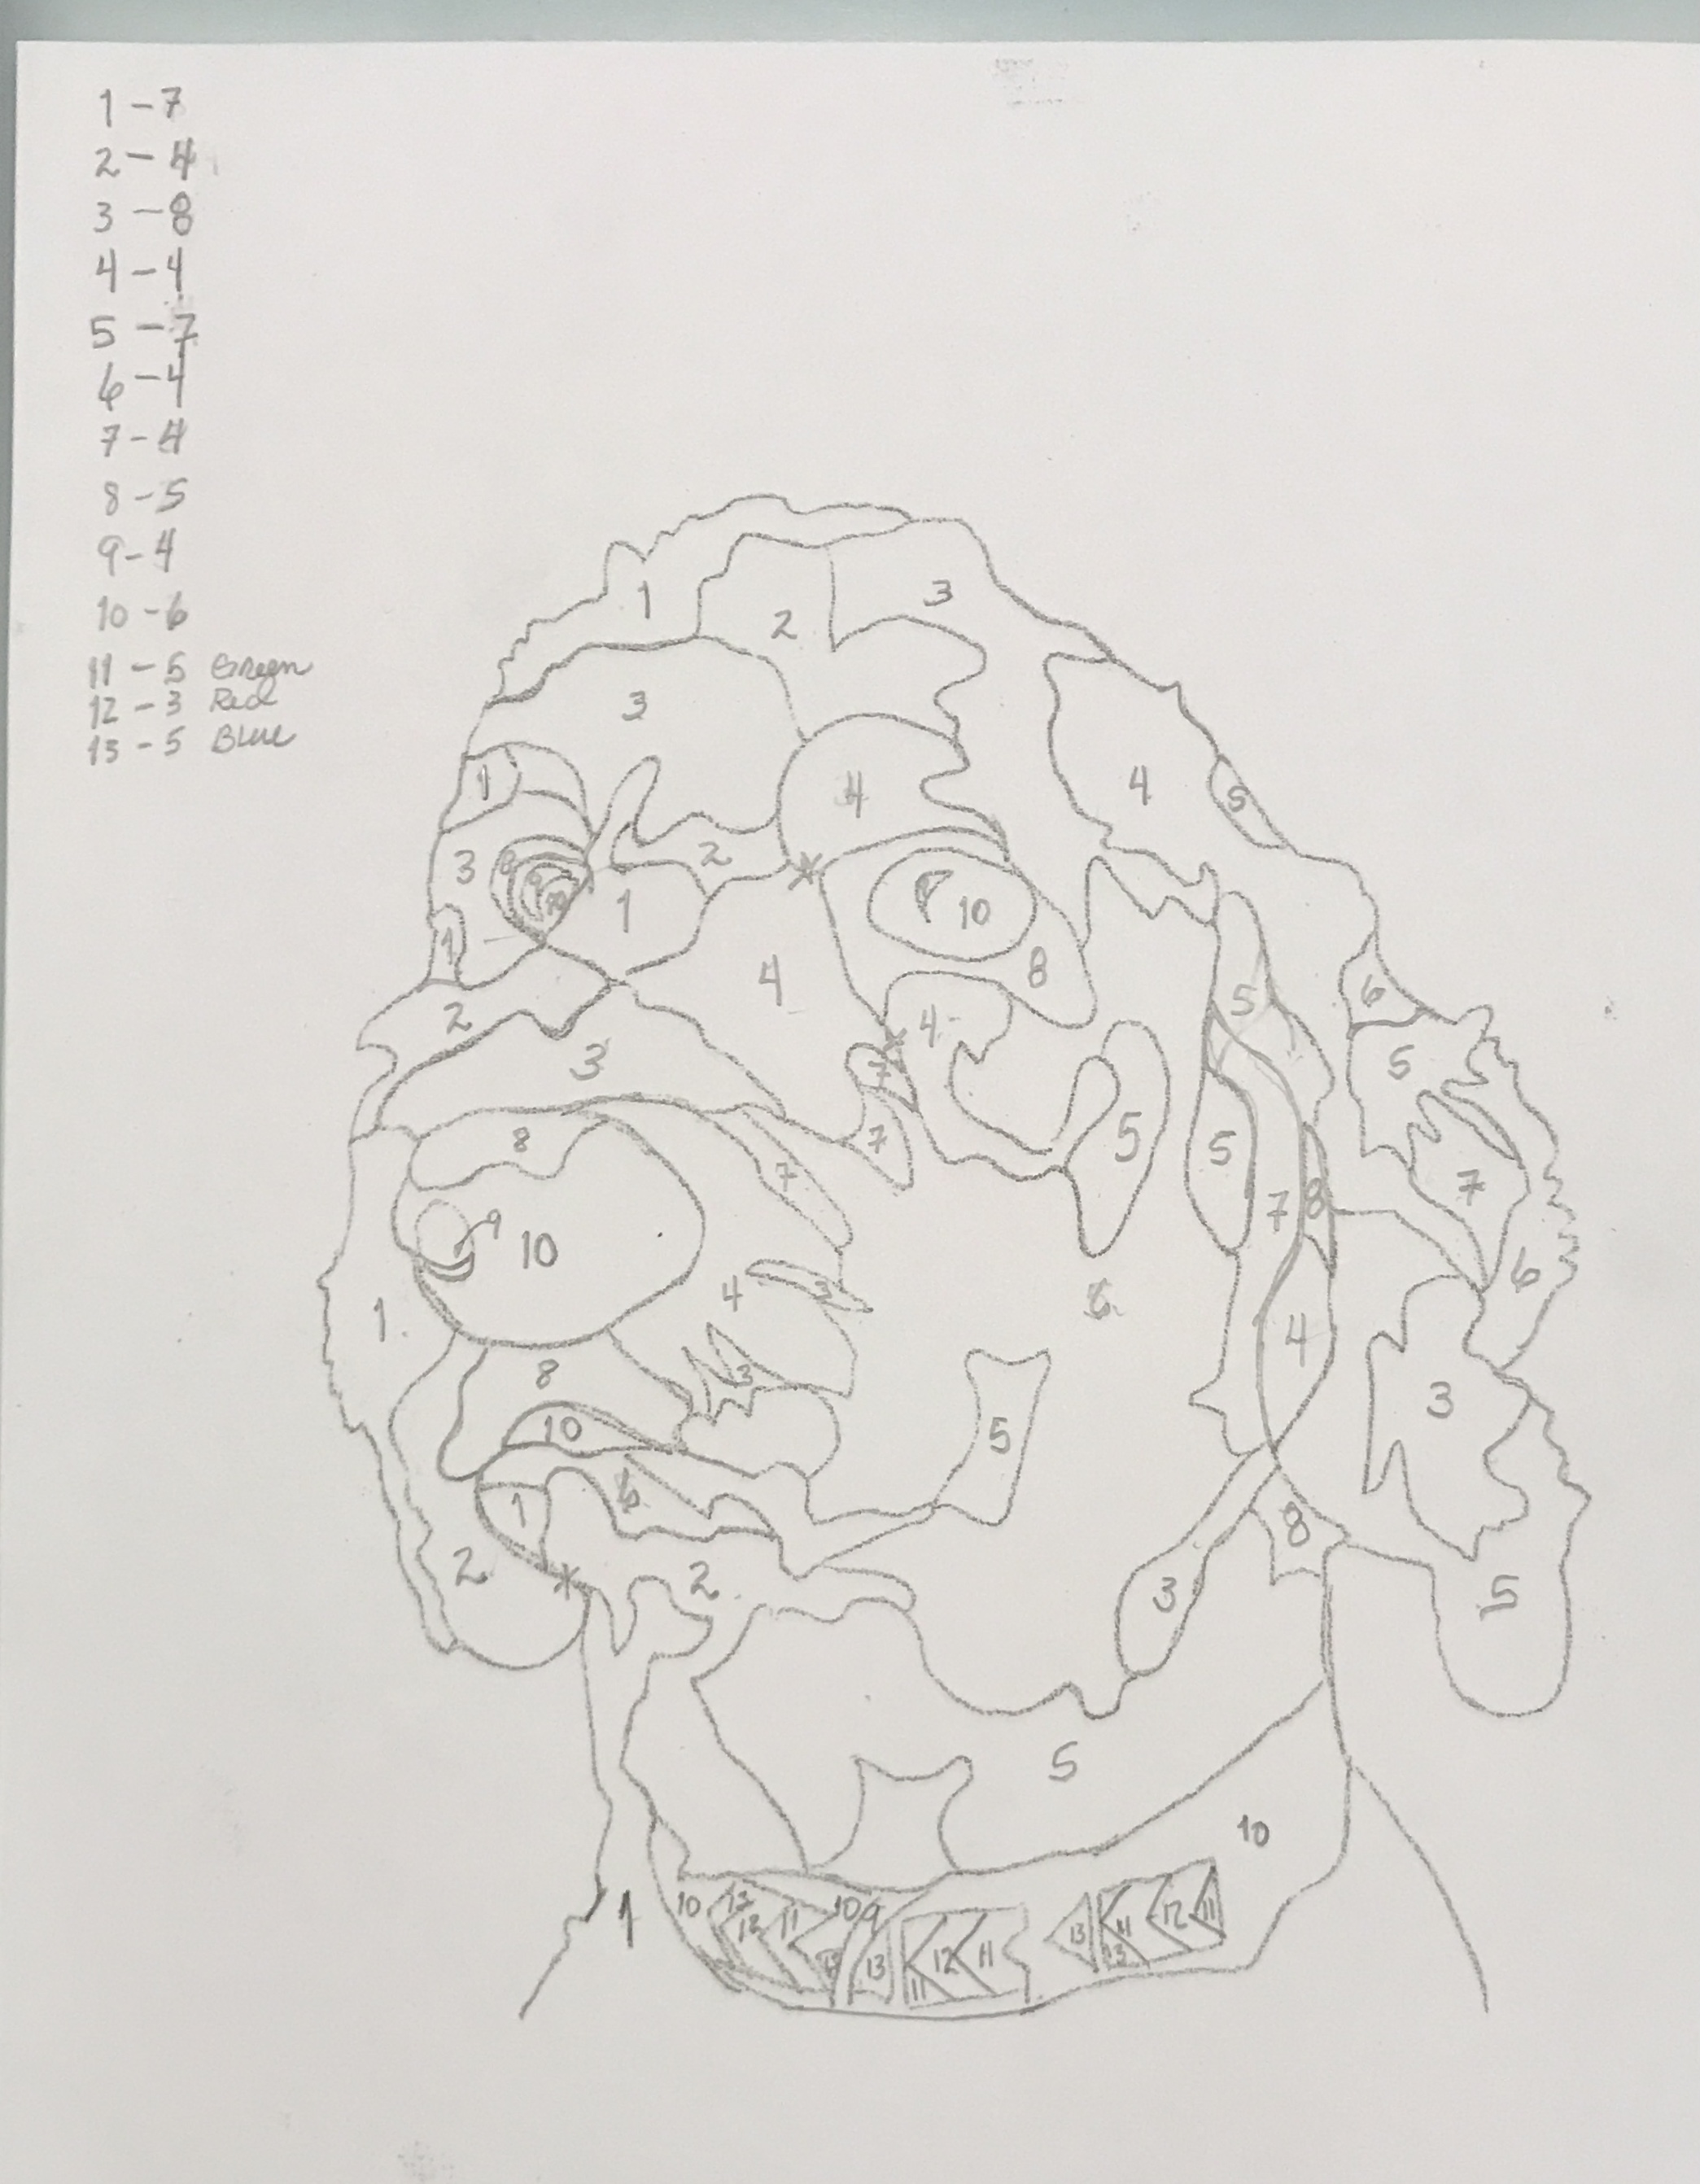
The next steps are: first, copy the outlines to a second sheet of paper, second, make multiple copies of this outline drawing, third, determine the number of colors to be represented with veneer, and fourth, select the veneer that best represents the photo's colors.
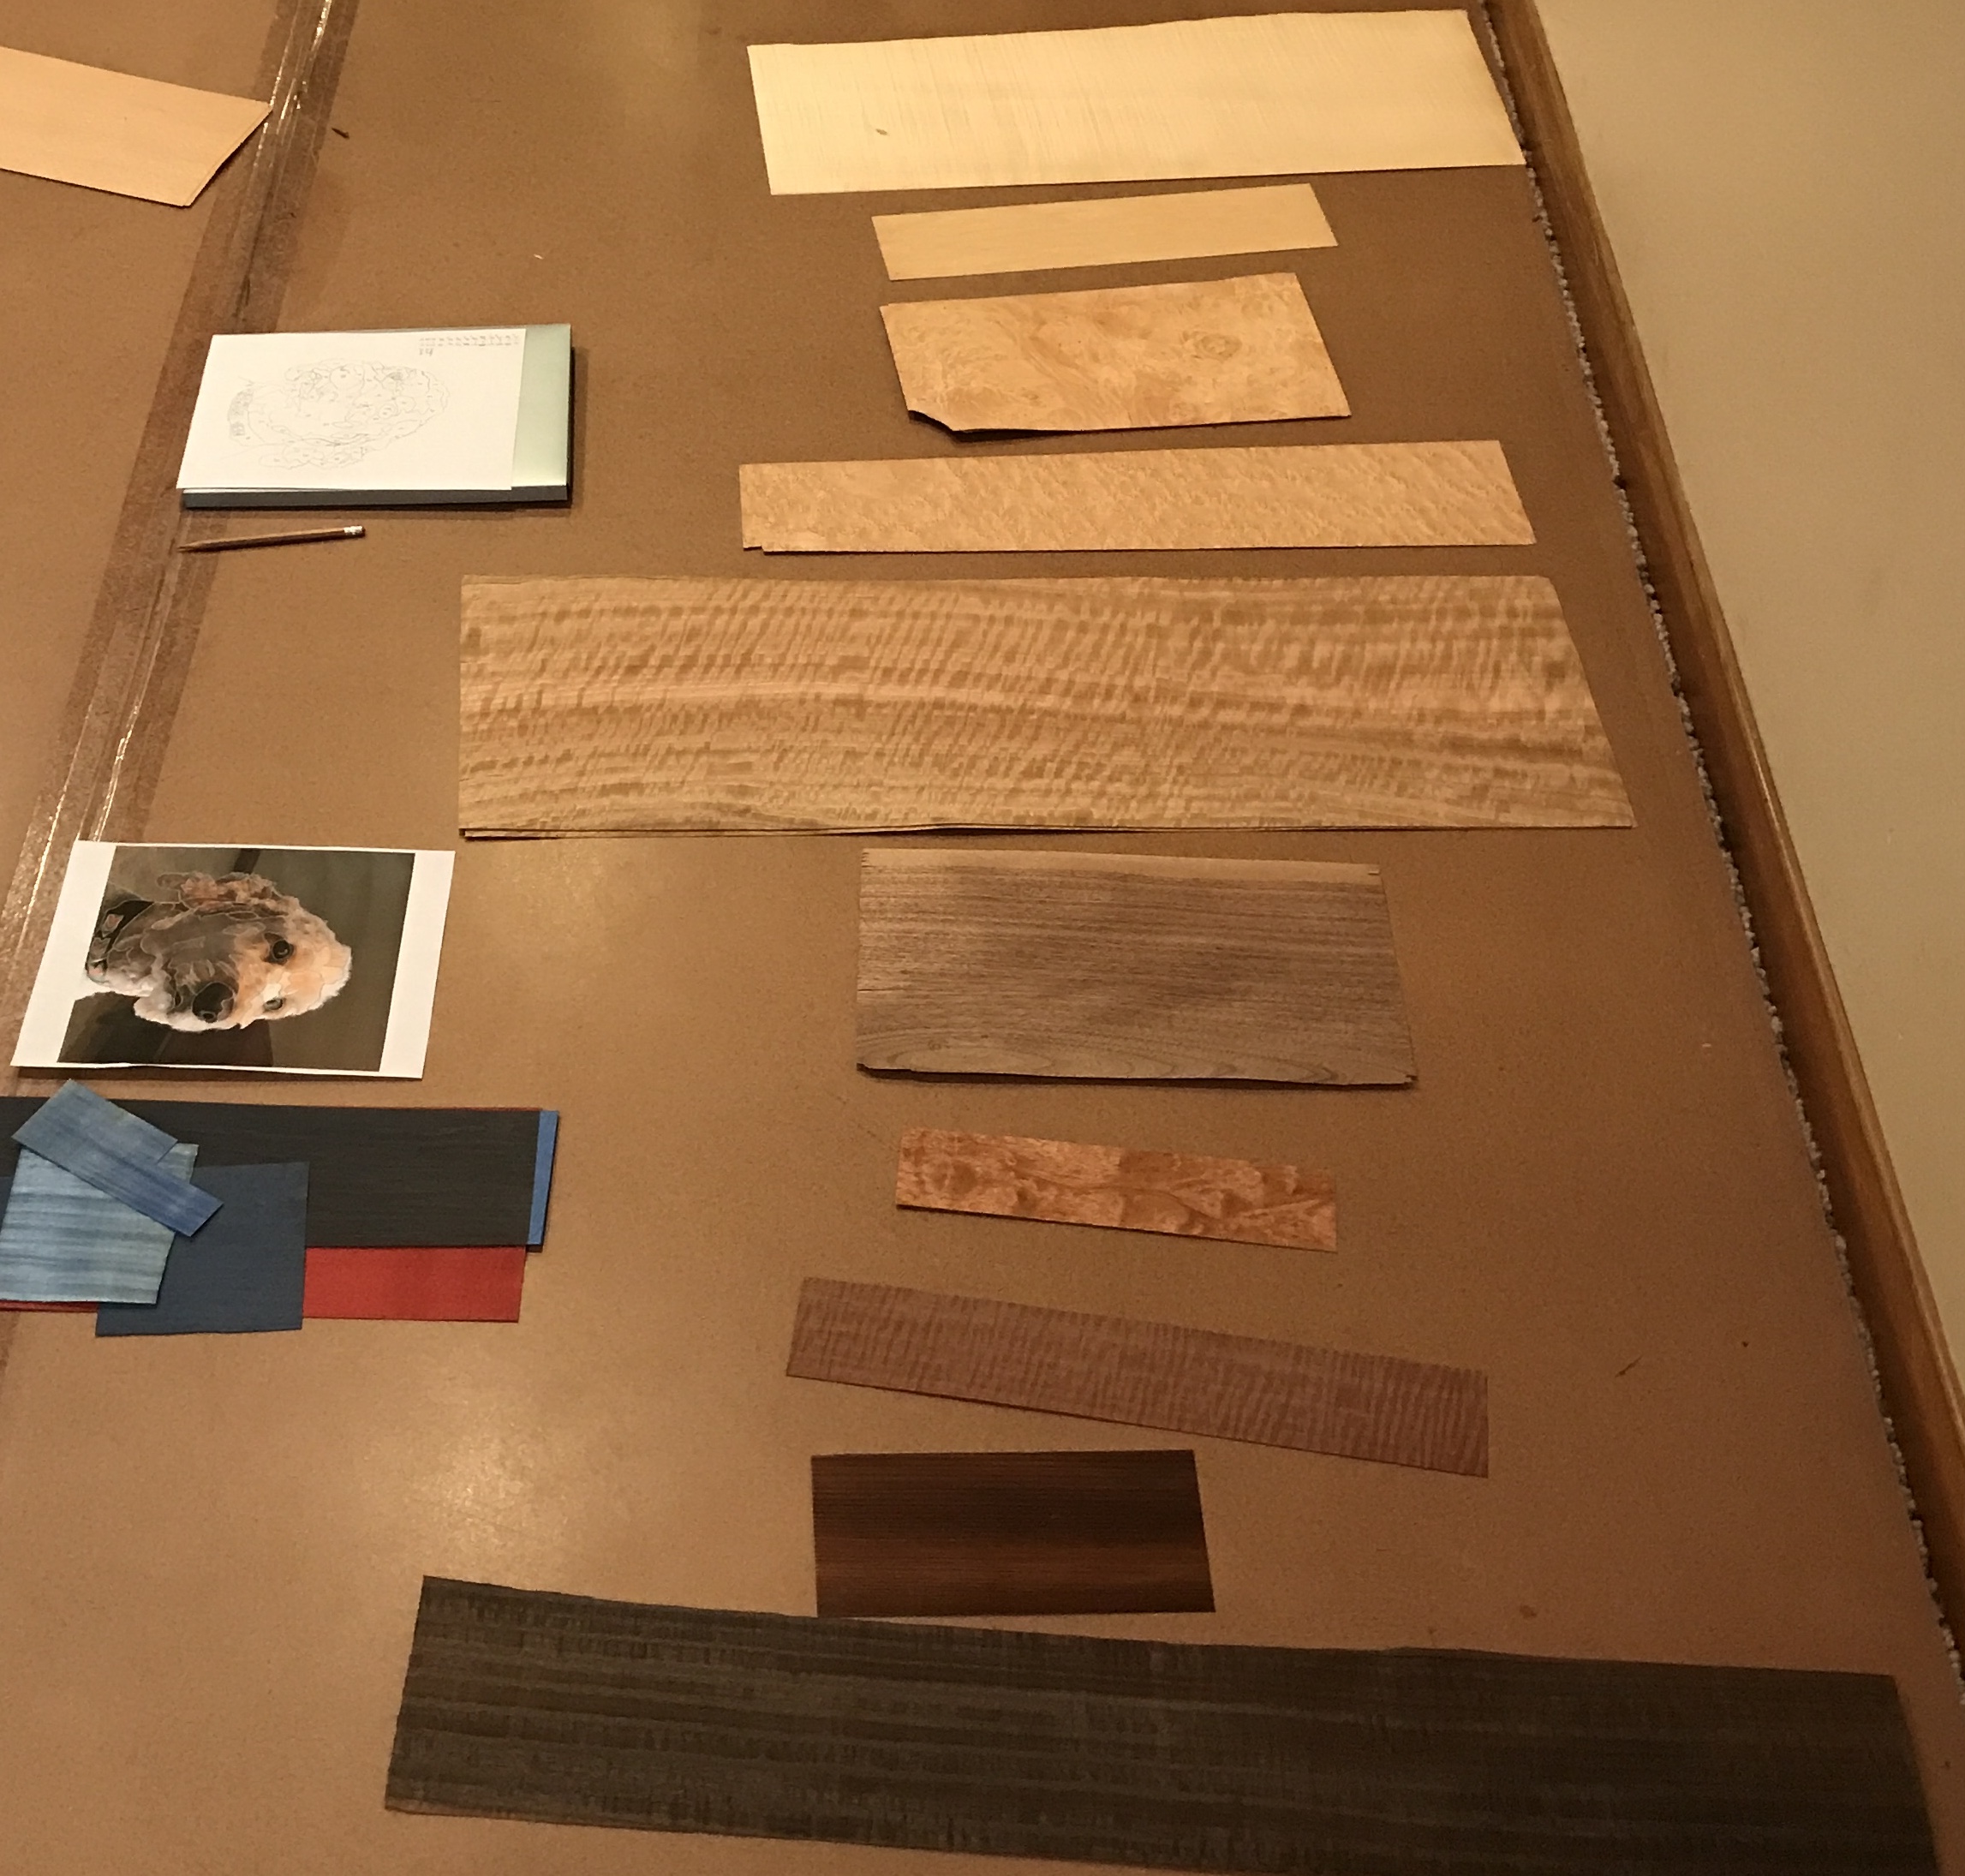
The first three steps above were completed. Thirteen numbers were assigned to the different colors seen in the photo above, probably too many. These assignments along with the tally of color locations are seen in the photo below.
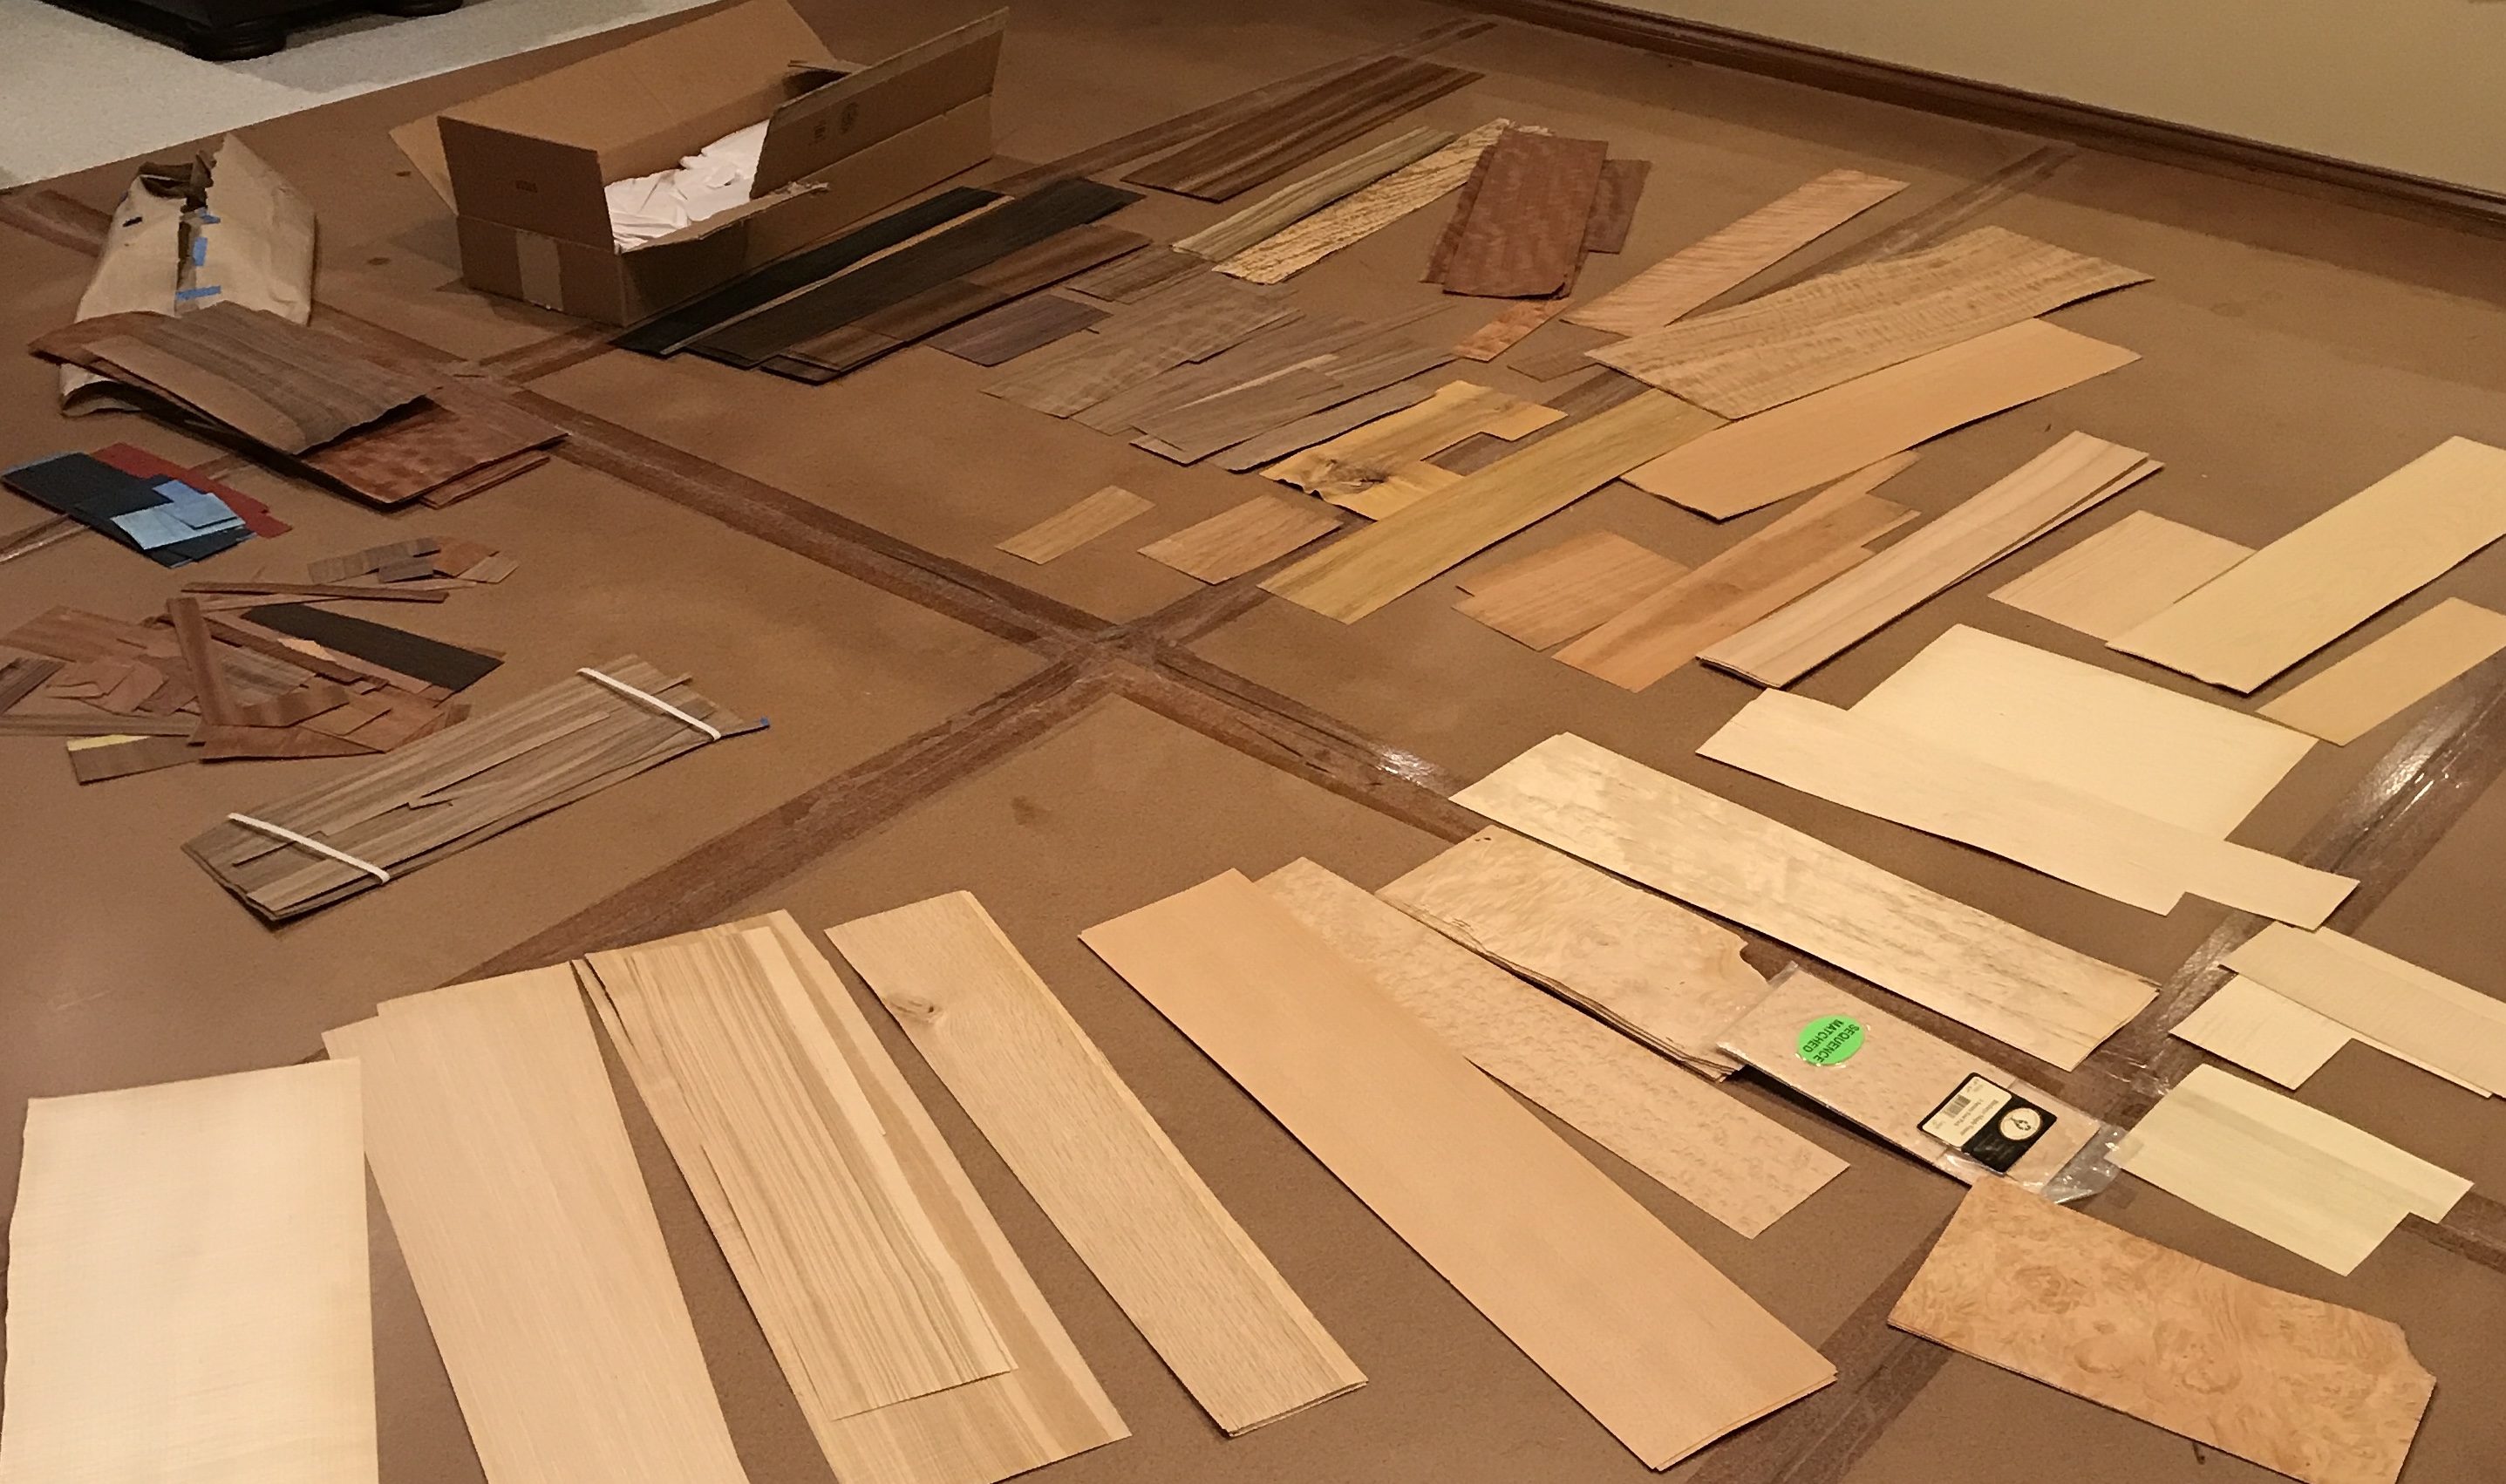
Two things have been accomplished. The veneer for all of the colors was selected from the veneer library. A few things were also purchased from Veneer Supplies. Softener was the most important as much of this veneer feels quite dry. When returning it to storage a larger wet paper towel will be included in the enclosing plastic bag. I also purchased more veneer tape and a large sheet (10 sq. feet) of an inexpensive veneer that was on sale, Curupixa. This veneer will be reserved for backing. Pieces were cut off of the chosen veneers as needed and the rest returned to the library and stored with two wet paper towels. The first photo below shows the veneer library (multiple sheets in each pile) and the second shows the selected ten colors for the dog along with dyed veneer for the collar.
The items ordered from Veneer Supplies arrived. An experiment was necessary for the veneer softener. The veneer softener was sprayed on a piece of the veneer (#6 in the above scheme). This veneer had a number of cracks and felt brittle. The softener was sprayed on both sides and held until it quit dripping. It was then wrapped with a shop cloth and pressed between two cauls with multiple clamps. The shop cloth will be changed every six hours until the veneer is dry.
The shop cloth was changed once and left overnight. It was completely dry this morning, so was removed from the paper. An attempt was made to cut this softened piece of veneer. It was literally a complete blowout. The veneer shattered very easily as if nothing had been done to it. I am not sure what to do now. The veneer pieces for this marquetry project are very complex. Without some way of minimizing veneer shatter this project will be unworkable in my hands. Marc's method is more complicated, but should work at least. I will need to purchase glycerin and fiberglass screen. Many pieces of veneer will need to be done at the same time in the vacuum press.
The materials were purchased for following Marc's method. The challenge was finding glycerin. After checking three different stores an 8 oz. bottle was found at Michaels. Some fiberglass screen was purchased at Menards along with 1 gallon of white glue. The liquids making up the solution will be combined as follows: 4 oz. of glycerin, 8 oz. of white glue, 8 oz. of denatured alcohol, and 16 oz. of distilled water. This solution does not keep, so all of the veneer for use in this project will be done at the same time. Not yet certain whether cauls will be used in the press. There will be many layers of veneer and they will need to be laid out carefully to minimize warping between layers. The process will begin tomorrow as Rhea is out of town for four days and the vacuum pump will be running continuously.
The selected veneer was treated according to the instructions detailed in Marquetry notes.html. The veneer was removed from the final 3 1/2 days in the press. I'm very tired of the pump running once a minute. I don't know how to find the leak, but will continue to work on it. In any event the veneer is now treated. Care had to be taken to separate the veneer from the Scott towels. I will attempt a cutting test to see how much easier it is to cut without splitting.
After the month delay to make the yo-yos and boxes marquetry is back in focus. Some project reconstruction was required. The veneer was reassigned colors. These are seen in order from first to tenth in the photo below. The three dyed veneers for the collar are not included.

The next task was assigning the packets. There was some adjustment from the packets assigned a month ago. There were the five original packets: left eye (orange), right eye (red), nose (green), collar (purple), and ear (light blue). To these were added throat (dark green), cheek (brown), and head (yellow). These packets were outlined with different colored pencils and can be seen in the photo below.

One of the simpler packets is the left eye, outlined in orange, and will be tackled first. This packet uses five different veneers, four, six, eight, nine, and ten. One of the challenges this packet presents is a small bit of veneer number nine, completely surrounded by veneer number ten. Putting the fragment of veneer nine in place might be a candidate for cutting in from behind.
Grain direction was chosen from the photo and laid out on the packet diagram. It was noticed at this point that veneer four, spanning a significant portion of the packet, has fur running in two directions. This veneer will be treated as two different pieces even though they are the same wood. In this way the fur directions can be better modeled by the veneer's grain.
The first packet was tackled this morning. It took some relearning to get everything done correctly. The packet was copied to the transfer paper. From this onto the taped parts of the packet. The intersections of the parts were cut keeping the upper keeper piece to the left of the blade. There was some shattering of wood in a few spots, but minimal and easily repaired. The number four veneer, curly maple, curled when applying the veneer tape, so it was glued to the tape as needed. The picture below shows the packet finished except for the "Nike swoosh" in the middle of the eye. The packet was left to dry under the cutting mat.

The next packet to be cut is the neck packet, chosen because it is reasonably simple. The first two veneers (#1 & #2) were taped together and a cut was made between them. A piece broke off of the #1 veneer and could not be located. After applying the veneer tape, glue was put in the gap and a small fragment was cut by hand and stuck in place. The curling curly maple veneer, #2, had to be glued to the veneer tape in one location. The glue was allowed to set for an hour before proceeding with the remainder of the packet. A photo of the completed neck packet is shown below.

Some of the edges of the parts have been rough, so I decided to change the blade partway through the neck packet. When installing the new #2 blade, I realized the old blade was probably a #5! I expect the next cuts to be much nicer!
The head packet is probably the simplest and was started next. While scanning across other packets a few colors did not align with the same marked color in other packets, so some were were altered on the fly. The grain was aligned as each piece was added to the head packet. The first cut was between a #3 veneer and a #2 veneer. One of the two veneers started to curl after the veneer tape was added. The packet was placed under the mat with a cast iron weight for 30 minutes to let it dry flat. Drying was repeated with each additional layer of veneer tape, so building the packet took longer than usual. A photo of the completed packet is below.

The nose packet was begun and finished this morning. A change was made to the veneer choices for the nose itself. Veneers #8 and #9 were switched after staring at the original photo. I decided the nostrils needed to be darker. The nostrils were drilled for blade access and then cut directly into the surrounding veneer. There was some chipping and this was repaired with a drop of glue and small fragments of the #9 veneer (seen in the first photo below). The remainder of the packet went well. The surrounding pieces were added in the following order: first the two #8's above and below the nose, then the #6 veneer on the right side, and then clockwise around the packet. Going clockwise ensured that the cuts left the packet into space. The completed packet is seen below, though it looks more like an alien than a nose.


Accepted the ear challenge on the last day of November. First and most important was mapping out the order of cuts, building from the inside out. The actual cutting resulted in a little less detail than desired, but all in all it was pretty successful. Three pieces are left to add after 2 1/2 hours of work. The intense concentration required reminds me of playing chess. A few more pieces added after lunch and the ear packet is complete as shown in the picture below.

These packets are surprisingly unrevealing. None of them even hint at the eventual desired picture. Hopefully, their unrevealing nature is not a hint of how the final picture looks.
After a weekend caving with Ollie, Banner is back in focus. The cheek packet was started this morning. It uses a large piece of the #6 veneer as the main background around which other veneers are attached. The photo below shows the packet transfered to the #6 veneer.

The order of cuts was planned and started on the upper right side of the packet. All cuts proceeded well. Tape was placed on the wrong side in an early cut and then placed on the other side as well. The tape on the wrong side was not removed at this point. The finished packet can be seen in the photo below.

It is now December 5 and we are closing in on the last two packets. The collar was the next target of my effort. This packet requires cutting the colored stripes into the black background. Each group of stripes became a mini-packet. The first group on the left of the collar began by tracing the mini-packet onto a piece of red veneer. A piece of blue was cut onto the left side and then light blue on the right side. The next two chevrons were cut similarly, except for the middle chevron, which required a cross piece of #9 veneer.
The collar was traced on the #10 veneer and the piece of #5 veneer was added to the end. After the three chevrons dried the middle chevron was cut into the collar background. This was done with two cuts, one of which went around the majority of the chevron. The next two chevrons need to be cut in place after drilling starter holes.
The two chevrons were taped into place after aligning with the tracing and the rest of the collar. Holes were drilled in the tips of the chevrons. The chevrons were cut in and then both taped in place. The drill holes were filled with glue and the #10 veneer as were a few other open spots. The collar before filling the holes is shown in the photo below. The glue was allowed to dry under weight for a few hours completing the collar packet.
Laaaast packet, the right eye! This packet might be a little troublesome as the eyeball is somewhat complex even though I have simplified it a bit. The packet begins with the #1 veneer on the lower right to which the #2 veneer piece was added. The eyeball is added next beginning with a small bit of #10 veneer, surrounded by #9, surrounded by #10, and finally surrounded by #8. The #6 veneer completely encloses the eyeball followed by two bits of #1 veneer, completing the packet.
The above plan was not successful. The eyeball was too complex and was simplified to a single hemicircle of #10 veneer. After restarting all of the cuts went without issue and the right eye was completed. This last packet is seen in the photo below.

Putting this into the background will proceed somewhat differently than is usual. In this picture even though there are parts (or packets) in front of other parts, it makes no sense to cut them into the background individually. This would also complicate the overlapping cuts, or where cuts on one packet overlap the adjacent packet. The approach that seems safer is to assemble the eight packets and cut these into the background as one.
The order of packet assembly will be as follows beginning with the cheek: collar, throat, nose, left eye, right eye, head, ear. Again this is a clockwise procession around the beginning and most central packet. The collar is the first packet to be added to the cheek, because it does not require any other packets to already in place. A new tracing will be used to align the successive additions.
The new tracing was first aligned with the cheek and then the collar was pushed underneath the tracing and aligned. The parts were taped with green tape and then cut. After cutting and separating the parts, veneer tape was applied to the back side. The photo below shows this first cut completed. The dark veneer shattered at the left end and may need repairs.

A repair was made in the collar and then I moved on. The throat, nose, left eye, and right eye were added sequentially. A few spot repairs were made along the way. The head was cut in next. Accidentally cut in along an ear line. That line will need to be double cut. Didn't double cut it after all, just moved the curve over a bit to avoid the old cut. The ear was attached completing the packet assembly. The photo below shows the completed assembly. Sort of looking like a dog!?!

A sheet of 1/4" plywood was selected for the backer board. It needs to have the cheap veneer glued on the back prior to gluing on the picture. A background veneer had not been chosen earlier as far as I can determine. Now is the time! There were only four veneers wide enough to use as background veneer. The selected veneer is shown under the assembled packets in the photo below.

Note: some repair work is needed around the eyes and maybe a few other spots. I also need to determine whether to add glints to the eyes prior to gluing the assembly to the backer board.
The first thing accomplished this morning was a trip to Menards to purchase the backer board. An 8 1/2"" X 11" piece was cut from this 1/4" sheet of plywood, not ideal backer board. The veneer purchased for covering the back of marquetry pieces was cut producing a 9" X 11 1/2" sheet. Glue was applied to one side of the backer board and the veneer pressed in place. This was placed in the vacuum press and pressed for two hours.
After looking at the Banner picture I decided that glints in the eyes were needed. A scrap of #10 veneer had a scrap of #1 veneer taped on and a moon sliver was sketched on the tape covering the light veneer. A hole was drilled using a #60 drill (smaller than the previously used 1/16" drill at 0.040") at one end of the moon. The shape was carefully cut keeping the moon to the left of the blade. The light moon was a nice fit in the dark background. After this successful trial a bit of the #1 veneer was taped over the left eye. Using a tracing a moon was transfered to the eye. This was repeated on the right eye. Two holes were drilled and the moon shaped bits were cut out. Again very nice fits in both eyes. At the same time some gaps around the left eye were repaired. The photo below shows the result of these efforts.

Maybe it's just me, but the glints make him look a little sinister, or maybe guilty.
Yowzaa! That was some cut! The head was taped to the background veneer. There were no hole locations within 2 1/2" of the edge of the veneer so the Sherline could not be used to drill a starter hole. It was then discovered that the chuck on the drill press would not hold such a small drill. A hand drill was used and worked well to put the hole through the underside of the ear. The entire head was cut in one pass! At the end I realized there was no tension on the blade the entire cut! It made no difference as the cut was really superb. The photo below shows the head sitting loosely in the background. The head was taped in place with veneer tape and let dry under a board and weight.

Twenty minutes later glue was spread on the front side of the backer board opposite to the veneer just glued. The marquetry piece was centered on this board and pressed in place. It was put in the vacuum press and left for two hours.
After the press came scraping. First, the veneer overhang beyond the backer board was cut off with a knife. Forty minutes of scraping with a card scraper was needed to remove most of the veneer tape. The pictures below show the piece just out of the press, partially scraped and with the scraping completed. Somebody's peeking!


Rhea was at Pilates this morning, so I used the opportunity to sand the portrait. Sanding was done on the downdraft table with the oscillating sander. 120-grit paper was followed by 220-grit paper. The back veneer was also sanded with 220-grit. The back was signed and dated. It is time to construct the frame, so off to Menards for some molding. I will look for something that is light and not heavily figured. The photo below shows the portrait after sanding completion and dust removal.

Some small pieces of the #10 veneer were used to cover parts of the eye flares to see if I could improve Banner's disposition somewhat. Either there was little change or the eyes no longer looked at the viewer. We will just have to stick with Banner looking a little guilty, not that he ever does anything wrong!
Oak was the only wood cut into the correct profile, so a minimally figured piece was purchased. The frame members were cut using the frame cutting jig. The cuts were not quite perfect with two frame members a little longer than their opposites. The portrait was reduced slightly in size in both directions. The frame members were then glued up in the frame jig as seen below.

Walnut splines (1/8") were cut on the table saw. The spline cutting jig was then used to cut the dadoes for the splines about 1/2" deep. The splines were glued into the corners as shown in the photo below.

After allowing the glue to dry overnight, the splines were cut off with the spline saw, a saw with kerf only on one face. The corners were sanded. There was a small gap where a fat spline did not sit all the way into the dado. This gap was filled with glue and the surrounding area sanded, hiding the gap. A similar fix was needed on the marquetry where the background veneer had a tiny hole through to the plywood below. The photo below shows the completed splines.

The first coat of lacquer was applied by brush on the marquetry and the frame at 9 am. Two coats to go with two hours between coats. The second photo shows the painting in wood in the frame after three coats of lacquer on each. The picture was affixed to the frame with #4 wood screws and #6 washers. A toothed hanging fixture was purchased at Michael's and installed to complete the project.

